There are two options available to provide the marked examination submissions to the external examiner:
1. Give the external examiner access to your module so they can access the graded submissions themselves, or
2. Download and send a selection of students’ graded assessments to the external examiners.
• Number of examination submissions that should be moderated
• File size of examination submissions
• Digital fluency of the external examiner
• Risk associated with giving external examiner access to your clickUP module.
1. Provide access to your clickUP module
You may submit a request to grant an external examiner access to your clickUP module. Granting this role provides them with access to the entire module content.
It is your responsibility to guide the examiner to the specific area where they are required to moderate submissions or assessments.
Giving an external examiner access allows them to view all student submissions within your module.
You must decide on the examiner's workflow for providing marks and feedback:
- Offline Marking (Recommended for simplicity): The examiner uses Excel sheets (prepared by the internal examiner) to provide marks and feedback. You are responsible for loading this data into the Gradebook later.
- Online Marking: The examiner uses a clickUP Rubric to mark submissions directly within the platform. (Ensure the rubric is set up and calibrated before granting access.)
-
NOTE 1: The risk exists that the external examiner may accidentally change settings, change or exempt marks, or delete attempts.
-
NOTE 2: Make a backup of at least your Gradebook before the external examiner gets access to your module.
-
NOTE 3: Due to the varying processes followed within the university, EI will not be able to provide central training to the external examiners. The internal examiner have to provide guidance/training to the external examiner for the whole process.
1.1 Request access
- Follow this link for steps on how to request access.
- If the external examiner is not a UP staff member, the academic department has to provide guest access to them in the PeopleSoft Permissions Manager.
- The role of FACILITATOR should be given to the external examiner.
1.2 Prepare your module for your external examiner
You will have to create a Gradebook Filter for the external examiner to only view the applicable gradebook items and students that should be moderated. The filter/s set up will be determined by:
- sample selection,
- columns that contain the student submissions, and
- how the external examiner should submit marks and feedback.
1.2.1 Sample selection
This step is only necessary if you have to pre-select the moderation sample for the external examiner.
- Click on Groups.
- Decide if you want to manually select students from the class, or allow the system to randomly select students for moderation.
- See the links for steps on how to create a custom group, or random group.
- Assign the name External Moderation to this group.
1.2.2 Allocating Marks
To ensure the external examiner's marks and comments are recorded independently and do not overwrite the internal examiner's entries, you must create separate columns in the Gradebook specifically for the external examiner's input. This practice guarantees that both sets of data are preserved for final moderation and comparison.
- Move all examination items to the top of the list in the Gradable Items tab. This arrangement makes it simple for the external examiner to locate and review the exam items.**
External examiners can provide marks and comments to you using one of two methods:
-
Use a provided Excel spreadsheet: The examiner adds the marks and comments to a template spreadsheet, which you then upload into clickUP.
-
Use an existing Rubric: The examiner utilizes a rubric directly within the system to apply marks and feedback.
1.2.2.1 Create separate External Examiner item/s in the Gradebook
To provide an Excel sheet to an examiner, you first have to create an item in the Gradebook to download.
-
Click on Gradebook.
-
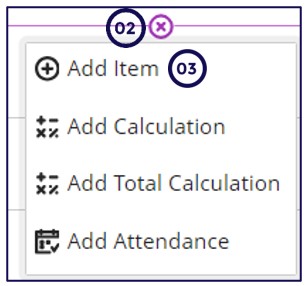
On the Gradable Items tab, click on the plus sign (+).
-
Click on Add Item.
-
Type in a Name: External Examiner Mark.
-
Set the Category to No category to keep it excluded from the calculation of Final Marks. If the column is to be included in the Final Marks, set the Category to Exam.
-
Set the information options as you want the grades to display.
-
Click on Save.
- Keep the item HIDDEN from students.
- To be able to import the external examiner's mark into the Gradebook, you have to use the steps below to create an Excel file for the external examiner.
Prepare the Excel spreadsheet for the external examiner
Download the item you created for the External Examiner to provide them with an Excel file in which to add marks and comments:
1. Click on the Download gradebook icon at the top right of the Gradebook.
3. Select Full Gradebook.
4. Choose the item you just created. (You have to download a separate Excel file for each item to be able to upload comments from the external back into the Gradebook.)
5. Select Include feedback for the selected item to allow the External Examiner to add comments.
6. Click on Download.
.

DO NOT change the name of the file you downloaded.
DO NOT change the file extension of the file you downloaded.
7. If you preselect the sample for the external examiner, remove the students from the list who should not be assessed.
8 . Do not modify any columns or their headings.
1.2.2.2 Use a rubric to add marks to the Gradebook
If the external examiner must provide marks and feedback directly inside clickUP using a pre-existing rubric, follow the steps below to ensure the rubric is correctly set up.
The external examiner will need to work in two separate browser tabs.
This is necessary because the rubric will be linked to an offline assignment item (used for recording the external moderator's mark), NOT the examination submission itself.
This two-tab setup allows the examiner to reference the submission with the internal examiners evaluation, while scoring it against the external moderator's rubric.
- Go to the Content tab in clickUP.
- Create an assignment in the examination folder and give it a name that indicate it is linked to the External examiner's rubric.
- Click on the Settings (gear) icon.
- On the settings panel, select No Due Date.
- Select: Collect submissions offline.
- Scroll down to the Grade Category and select No Category on the dropdown list.
- Click on Add a grading rubric and select the same rubric that you used for the examination.
Keep both the assignment and Gradebook item HIDDEN from students.
1.2.2.3 Create a Gradebook Filter for the external examiner to view marked student submissions
Create a focused view of only the grade items and students that the external examiner needs to access by following these steps:
- Click on Gradebook.
- Click on the Grades tab.
- Click on Filters.
- Under Groups on the Filters panel, select the External Moderation group you created. If the external examiner chooses the students to moderate, skip this step.
- Under the Categories, select the tick box for Exam.
- Click on Apply.
- A filter showing only the examination items (columns) and the pre-selected students will appear.
If any of the exam items are missing from this list, you will have to Edit the missing items to add the "Exam" Grade category to them. If the external examiner needs access to other Gradebook items as well, select them specifically from the Gradable Items list on the Filter Panel.
- Copy the URL at the top of the screen and save it somewhere to share this filter with the external examiner.
1.2.2.4 Create a Gradebook Filter for the external examiner to MARK student submissions with a RUBRIC
If the external examiner must provide marks and feedback directly inside clickUP using a pre-existing rubric, follow the steps below to provide an easy accessible view.
- Click on Gradebook
- Click on the Grades tab
- Click on Filters
- Under Groups on the Filters panel, select the External Moderation group you created. If the external examiner chooses the students to moderate, skip this step.
- Under the Gradeble Items, select the Assignment you created for the External Examiner.
- Click on Apply.
- A filter showing only the external examiner's offline assignment with its rubric and the pre-selected students will appear.
- Copy the URL at the top of the screen and save it somewhere to share this filter with the external examiner.
1.3 Communicate with the external examiner
Provide the external examiner with the following:
-
The external examiner guide on how to access and moderate in clickUP. Edit it to reflect your requirements.
-
If they have to use Excel to mark and provide feedback:
- The URL of the filter you created in 1.2.2.3 to view the marked submissions of the students.
- The Excel spreadsheet for each examination item.
-
If they have to provide feedback via a Rubric, provide them with the URLs of
- the filter you created in 1.2.2.3 AND
- the filter you created in 1.2.2.4.
- Clearly indicate which filter is for marking, and which is for viewing marked submissions.
-
Another option is to arrange a meeting with the External Examiner to show them how to access the student submissions they need to moderate.
1.4 Upload the Excel marks from the external examiner
- Make sure the Excel file is in .csv format and the name is exactly the same as the one that was downloaded.
- Go into the Gradebook.
- Click on Grades.
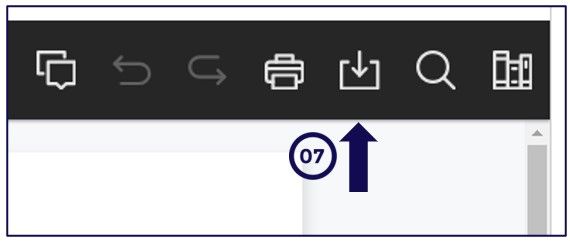
- Click on the Upload Gradebook icon at the top right.
- Drag the file into the Drop file box or click on Upload Local File.
- Select the .csv file from your computer.
- Click on Upload.
1.5 View the marks and comments in the Gradebook
If an Excel was uploaded:
- Click on Gradebook
- Click on Gradable Items
- Click on the name of the external examiner item you created.
- A list of the students will display with their marks and the feedback.

Do NOT post these marks.
Keep the column hidden from students.
If an offline assignment with rubric was used:
Create a focused view of only the grade items and students that the external examiner assessed to compare marks:
- Click on Gradebook
- Click on the Grades tab
- Click on Filters
- Under Groups on the Filters panel, select the External Moderation group you created. If the external examiner chooses the students to moderate, skip this step
- Under Gradable Items, choose the relevant columns to compare.
- A filter showing only the examination items (columns) and the pre-selected students will appear.
- Compare the results.
1.6 Finalise Marks
- Rework the results of the Exam and Final Marks as per your departmental/Faculty requirements.
-
If you modify student scores, always Post the updated marks before calculating the final grade in clickUP. This ensures the calculation uses the correct, most recent data.
-
Remember to keep all mark-containing columns hidden from students. UP Policy strictly prohibits students from accessing their marks directly in clickUP. Failure to hide these columns violates UP Policy.
2. Download and send a selection of assessments to the external examiner
All examinations have already been marked and need to be moderated by selecting the relevant graded assignments/tests to download.
2.1 clickUP Ultra assignments
If you need to send the graded rubric and graded assignment to the external examiner, you will need to download each student’s graded rubric, as well as the student's graded assignment from the Gradebook.
- Access the relevant clickUP module.
- Click on the Exam Assignment Link.
- Click on Submissions.
- Click on the Student’s name to access the graded attempt.
To print the rubric to PDF and the graded assignment (Download Annotated PDF), follow the steps below for each student’s rubric and graded assignment you would like to email to the external examiner:
2.1.1 Copy the rubric
- Expand the Grading Rubric, and enable Show descriptions.

- Copy and paste the rubric on an MS Word document and save it as a PDF.
2.1.2: Download the graded assignment
- Click the download icon arrow in the black bar above the student’s submission document. The document will download to your computer.
2 Select the destination where the file must be saved; type a relevant file name (name should contain the student number of the student), and click on the Save button.
2.2 Turnitin assignments
It is possible to select individual students’ graded Turnitin submissions or to bulk download all the submissions of a Turnitin assignment.
- Click on the Assignment link.
- A new LTI tab will launch, click on the Turnitin LTI tab.
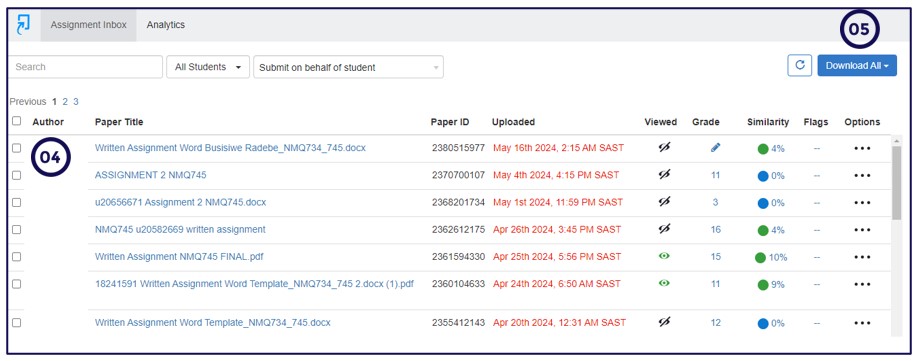
- The Assignment Inbox tab will display a list of your students’ graded Turnitin submissions.
- Select the students’ assignments you wish to download:
a) To select a subset of marked assignments, click on the checkboxes to the left of the student’s name and surname. You can make selections on other pages too, by navigating to the next page (selections made on previous pages are kept).
b) To select all the marked assignments, select the checkbox, to the left of the Author column heading. - Click on the Download button to the right of the page (it will only appear once you select the checkboxes).
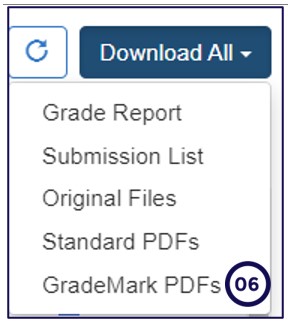
- From the Download pull-down menu, click on GradeMark PDFs.
8 You will receive a message that the files will be compressed into a zip file. Click on the OK button to continue with the action.
- A message will appear to indicate that you will be able to download the zip file, once the compression is complete. Click on the file link, as seen below:
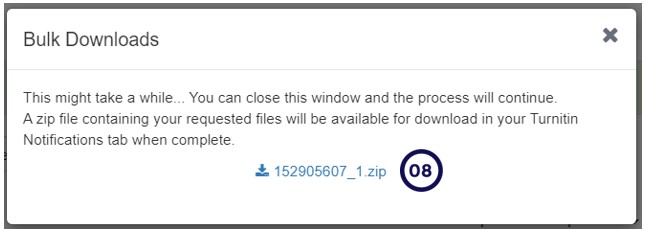
- The Zip file will be saved under the Downloads Folder on your computer. If you want to unzip the selected files to your computer, right-click on the ZIP file and click on Extract here.
2.3 clickUP Tests
It is not possible to do a bulk download of clickUP test submissions. You have to create a PDF file of each student’s test submission that you would like to send to the external examiner. Please follow the steps below to print a test to PDF format:
- Access the relevant clickUP module.
- Click on Gradebook on the top navigation.
- Under Gradable Items, click on the Exam that was created with the Test tool.
- Click on the student’s name.
- You will have to create screen captures of the whole test of each student and paste the student’s attempt on an MSWord document and save as PDF. If unsure how, follow these steps to make screen captures.
- Repeat for each student’s test submission that you want to email to the external examiner.
2.4 Send the files to the external examiner
- Create a folder on your computer and group all the downloaded student submissions into this one folder.
- Make sure the naming convention of the students’ files contains the student number.
- Zip the folder that contains all the students’ submissions (right-click on the folder and click on Zip).
- Distribute the zip file to the external examiner according to the departmental/faculty process.