View your profile
In the list where your name appears, select your name to access your profile. Your profile appears with some information, and you can't delete your profile.
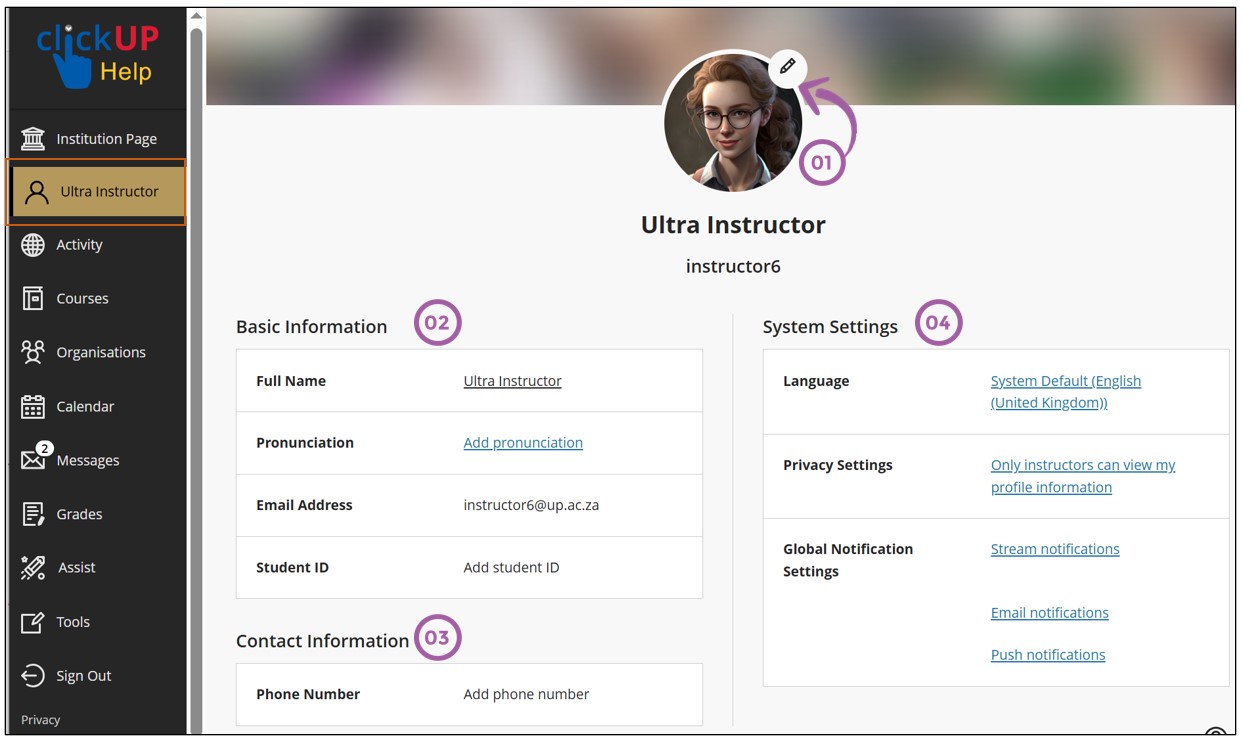
- Profile picture: Upload a picture to replace the generic silhouette.
- Basic Information: Information shown as captured in PeopleSoft. To make changes to this information, do so in PeopleSoft. You can, however, add the pronunciation of your name and surname into clickUP on the link provided.
- Contact Information: Students cannot see your phone number.
- System Settings: Change the language for the system, privacy and notification settings.
Upload your picture
You can store one image file in your profile.
- Point to the generic silhouette or your picture and select the pencil icon to upload, change, or remove an image.
- In the panel, select Upload new profile picture to browse for your picture on your computer. Or, you can drag a file to the Upload area.
- Your image is saved automatically. Close the panel to return to your profile.
Remove or replace your image
Upload or drag in another image. To return to the generic silhouette, select the** Delete this picture** icon to delete your existing image file.
Where does my picture appear?
Your profile picture appears on course content pages, course cards, rosters, discussions, conversations, and messages next to your activity. You see student profile pictures throughout your courses in the same areas and in the gradebook.
Add pronunciation
- Click on Add pronunciation
- Type in the pronunciation of your name and surname in phonetic spelling and/or
- Record the pronunciation of your name.
The card preview will allow you to see what other users will see when they view your information.
Configure your Notification Settings
You can decide which notifications appear in your activity stream, in your e-mail, and on the mobile app.
- On your profile page, point to the stream -, email - or push notifications and select the pencil icon to edit your notification preferences.
- Select the tab on which you want to configure your notification settings.
- Untick the activities that you do not want to see in a specific communication format.
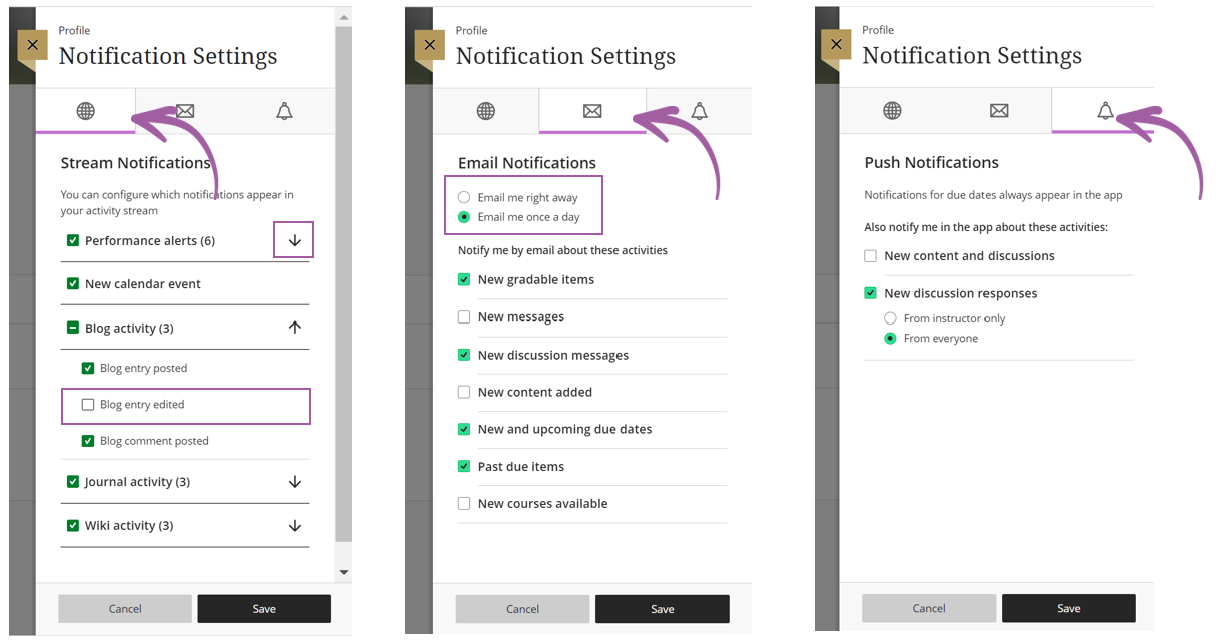
To manage the number of emails you receive from clickUP, select "Email me once a day" on the Email Notifications tab.
Note: If you want to follow a Discussion and be alerted via email of new Discussion posts, do not select this option.