Please note: Respondus currently does not work on MAC computers.
The Respondus software enables you to import certain question types (multiple choice, multiple response, true and false, essay, fill in the blank, and matching) into clickUP without having to create each question individually in clickUP, which will save you time. The University of Pretoria has acquired a campus-wide license for Respondus. To install the software on your computer and import the questions into clickUP yourself, follow these steps:
- Install the Respondus software on your computer.
- Prepare the questions in MS Word in the Respondus format.
- Use the Respondus software to publish the questions to clickUP.
Install and Setup Respondus
-
Download and install Respondus 4 Campus (4 April 2024 - V4.1000) The name of the installation program is “Respondus4Campus.exe.” Double-click the file to run it.
-
Once installed, start Respondus on your computer.
-
A popup will open that requires the Institution name, Local support contact, and Installation Password. Find the information needed for these fields in this document that is only available to UP Staff. Sign in with your UP portal username / password.
-
Click on License.
-
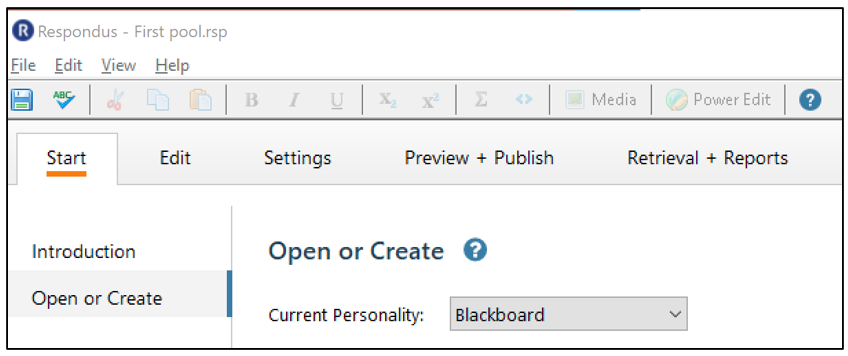
Choose LMS Personality: Blackboard. Click OK.
-
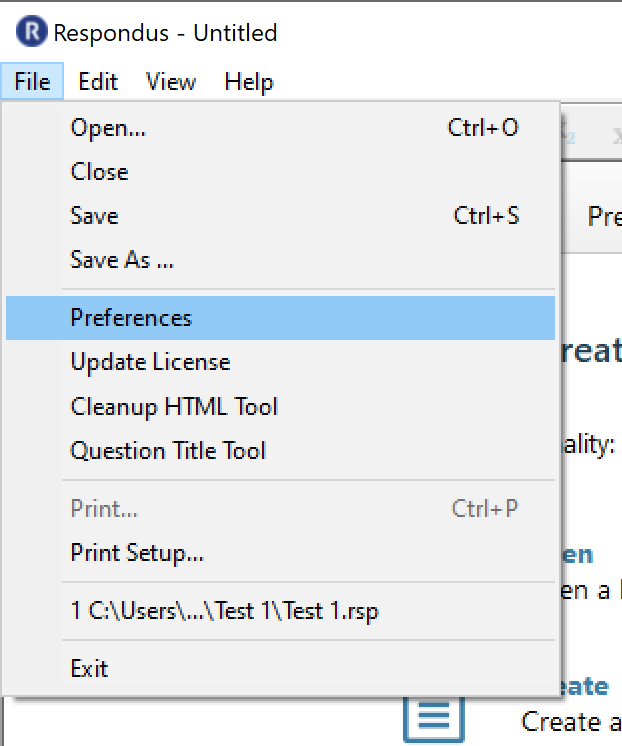
Go to File, then select Preferences.

-
On the Edit and Publish Tab, select the settings to once-off Randomise answers in Multiple Choice/Response and to create Random blocks, linked to pools.

- Click OK.
Prepare questions in Microsoft Word
- Create questions in the Microsoft Word file according to the Standard formatdescribed below. Download the document .
- Save the MSWord document to a rich-text (.rtf), text (.txt), or Microsoft Word (.doc) file. It is then ready to be imported by Respondus.
Upload the file into Respondus and publish to clickUP
- Open Respondus on your computer. You will see a number of tabs at the top that will guide you through the process.

-
Click on Start> Import questions
-
Select the type of file you created with your test questions, browse for the file you created.
-
Provide a descriptive name for the set of questions you will import.
-
Check on the Preview button that question numbers and titles correspond. If not, you can edit the Microsoft Word file and upload again, otherwise, note the missing questions and add them as in step 6.
-
If the Preview indicate that questions imported correctly, click on Finish.
-
The Edit screen will open. You may add other types of questions inside Respondus on this screen if needed. Select the question type, Fill in the fields and Insert questions into the list.
-
Click on Preview and Publish, then on Preview.
-
Click on Preview the file. Check that the question feedback is below the line! If there are errors, click on Modify Item and the top of the screen. It will open the Edit tab where you can correct the errors.
-
Click on Preview and Publish, then on Publish, and Publish Wizard.
-
Select Publish to single course, click Next. The first time you use the wizard, you will have to setup Respondus to communicate with clickUP. The steps to follow are below.
-
The popup screen will inform you to log into Blackboard and click on Continue after Login. Click OK to remove the popup.
-
The clickUP Login screen will display. Fill in your clickUP username and password, click on Sign In.
-
At the top of the screen that opens, click on Continue after Login. The clickUP screen will disappear.

-
Go back to Respondus. A popup screen will display (When the login process is complete, click OK below to continue). Click the OK button.
-
Click on Next.
-
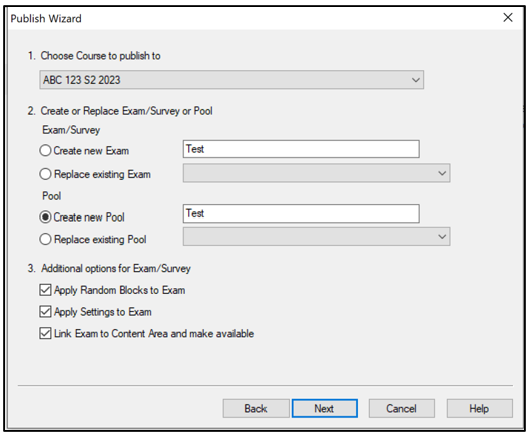
In the Course to publish to dropdown list, choose the module for which you created the questions.
-
Select Create a new pool, and provide a name for the pool. This name will display in the clickUP Pools area and will be used to select questions when you set tests.
-
Tick all the additional options.

-
Click Next.
-
A screen will appear that displays the status of the import of the questions into clickUP. Wait until the message appears that indicate a successful completion of the process.
-
Click on Finish.
-
Log into the clickUP Ultra Module that you selected for the import.
-
Click on Manage Questions in the Details & Actions area.
-
Your new pool will be displayed in the list. Click on the name of the pool to see the questions.

A test can now be created, using the questions from the question bank.
Setup Respondus to communicate with clickUP
This process is done once only when you use the Preview and Publish process of an assessment for the first time.
- Click on Preview and Publish Tab, then on Publish).
- Click on Publish Wizard.
- Select Publish to single course.
- Click on Next.
- Select Yes, check for preconfigured server settings. Click Next.
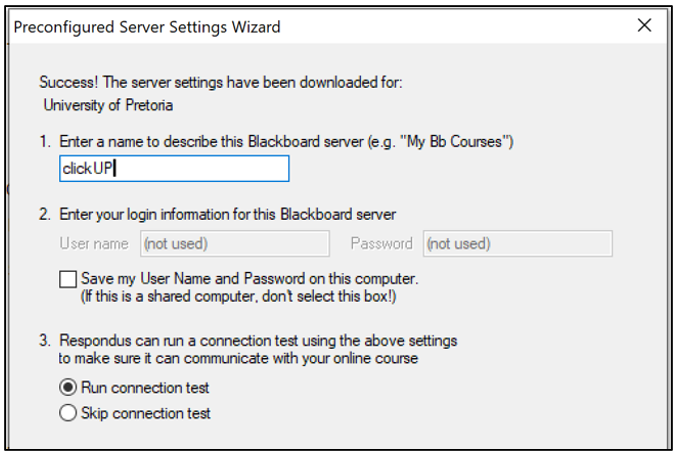
- Type in clickUP at Enter a name to describe the Blackboard server. Click Next.

- The popup screen will inform you to log into Blackboard and click on the Continue after Login. Click OK to remove the popup.
- Click on OK on the next popup.
- If a screen asks you if you want to make changes to your computer, choose Yes.
- The clickUP Login screen will display. Fill in your clickUP username and password, click on Sign In,
- At the top of the screen that opens, click on Continue after Login. The clickUP screen will disappear.
- Go back to Respondus. A popup screen will display (When the login process is complete, click OK below to continue). Click the OK button.
- A popup message may indicate that the connection test is still in progress - wait for the completed message.
- When the popup indicate that a server has been added/updated, click on Finish.
- Continue with the Upload the file into Respondus and publish to clickUP process from step 12.