Access your clickUP Ultra module where you want to add the interactive video. Then follow these steps:
-
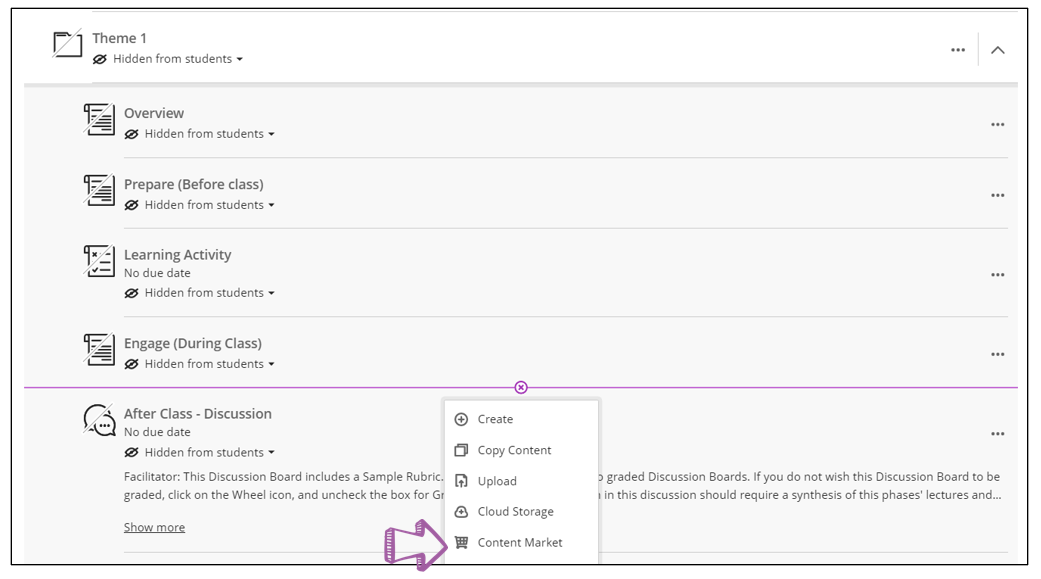
On the Course Content page, go to the space where you want to add the interactive content. Click on the Plus (+) sign.
-
Click on Content Market.
-
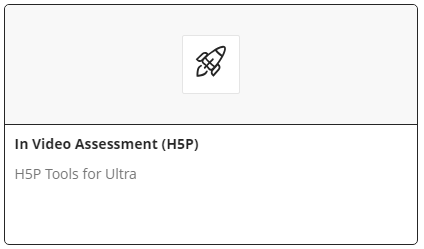
On the Content Market Page, scroll down and select In-Video Assessment (H5P).
-
The LTI link will launch automatically.
Create content on H5P
When you access this tool the first time, it will send a confirmation code to your email address. Add the code into the space for it and click on Proceed. The authoring tool allows you to add different content types. The HTML5-based ‘Interactive Video’ content type allows users to create videos that are enriched with interactions.
-
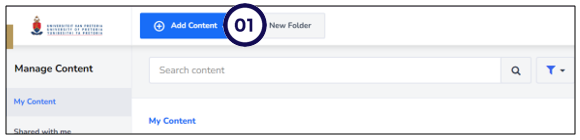
To start creating interactive content, click on Add Content.
-
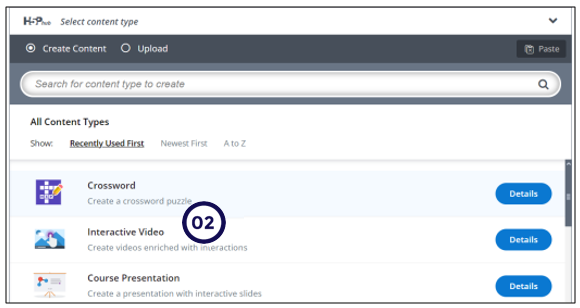
To start adding interactions on existing video(s), click on Interactive Videos.
-
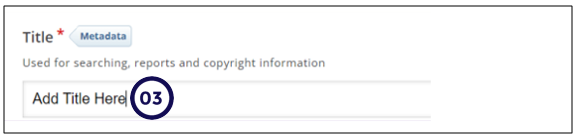
Add the title of the video, this is a mandatory field.
The Interactive video content type consists of three steps:
i. Upload/embed video,
ii. Add interactions and
iii. Summary task

By default, the Upload video tab is displayed when you create a new Interactive video, and this
is what you always want to start off with.
Step 1: Upload/Embed video
-
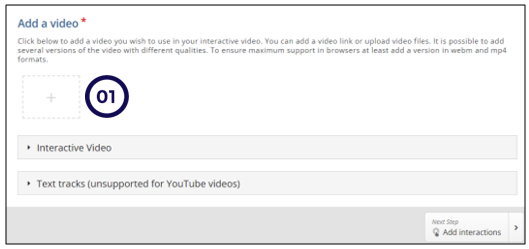
Add the video clips that the Interactive video is based on. To Upload/embed video click on the "+"/ plus button.
-
Copy the URL of the YouTube video and paste in the URL field.
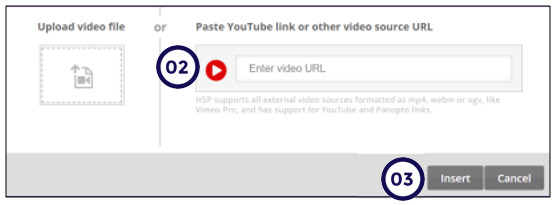
Please do not upload your video directly (use YouTube or other video streaming platforms).
- Once the video is uploaded click on Insert.
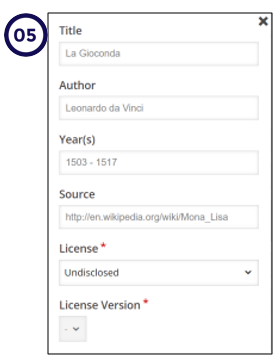
- Click on Edit copyright.
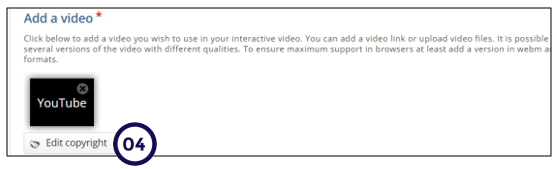
- Complete the fields with relevant information. If using a YouTube video that is not created by you, check the license and add the information accordingly.
Step 2: Add interactions
After you have uploaded the video, it will be previewed and the video editor is used to add Interactions.
Click on the Add interactions tab of the editor.
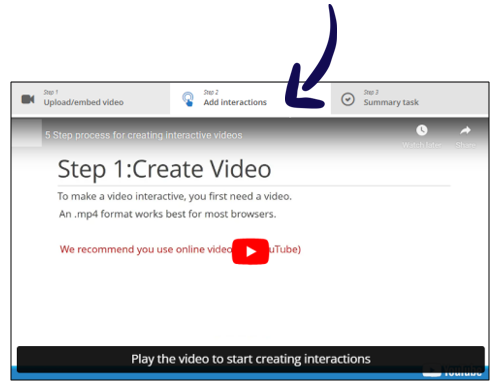
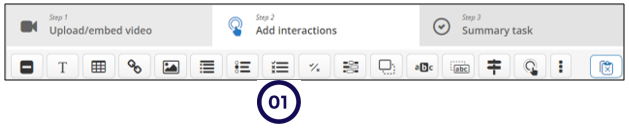
The tool bar (above the video clip) is used to add interactions to the video.

To add the interactivities, click on the tiles (interactive types). The following are the interaction types can be embedded in your videos:
- Quiz interaction
- Simple interaction (Text, Image, Table)
- Adaptivity (Go To)
The following question types may be added to your video:
- Single choice question sets
- Multiple choice questions with one or more correct answers
- True/False
- Fill in the blank
- Drag and drop
- Mark the word activities
- Drag and drop text
- Crossroads
- Free text questions
All question types can be configured to perform adaptive behavior, meaning that a correct answer could
cause the user to skip to a specified place in the video while an incorrect answer could take the user
somewhere else in the video. Typically, submitting a wrong answer will cause the user to be directed to the place in the video where the answer to the question is presented
Add the question type
For this step sheet you can use these steps to add a Multiple choice question to the video.
-
To add a multiple-choice question, click on the multiple-choice question button on the tool bar.
-
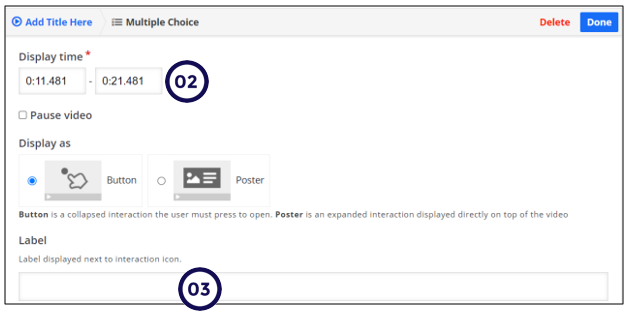
Add the display time, this is the time in the video where you want this question to appear.
NB: Tick the Pause video radio button if you want the video to pause at this interval. -
Add the label you want to show next to the interaction icon.
-
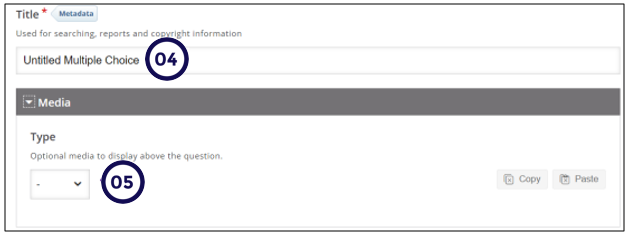
Add the question title.
-
Click on Media to add a media that will display above the question (optional).
-
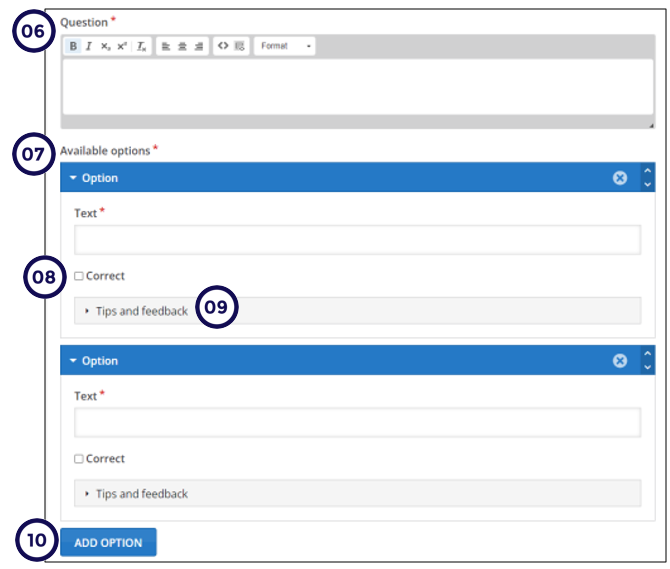
Under Question field type the wording of the question.
-
Add the multiple choice answer options.
-
Select the correct options using the tick box.
-
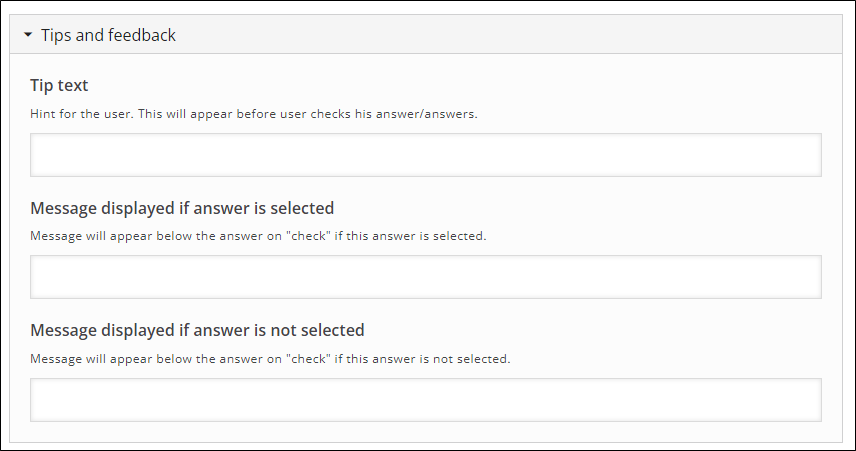
For each option, you can add feedback.
-
To add more options, click on ADD OPTION.
-
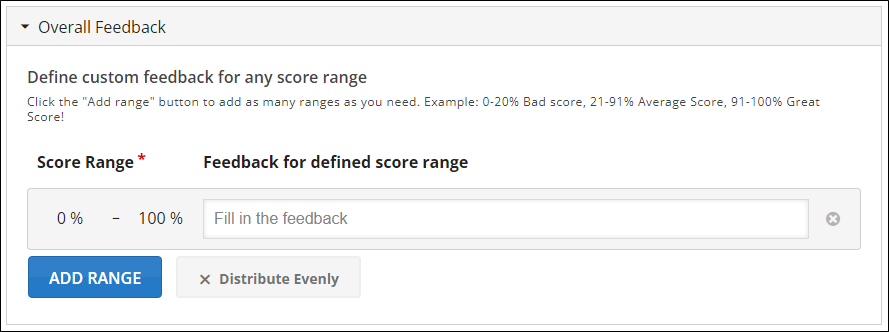
You can also add overall feedback per score range. To add range, click on ADD RANGE, to distribute the score click on Distribute Evenly.
-
Carefully select the behavioral settings for the question.
-
To add adaptivity, click on Adaptively to expand and set the action for the response.

-
Add the Submit screen.
The Submit screen is important as this is the place in the video where students must submit their answers for the grades to be captured in clickUP Ultra Gradebook.
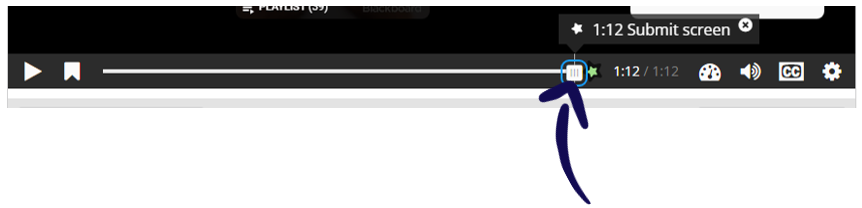
To add the Submit screen to the video, first drag the scroll bar to the time stamp where you want the submit screen to show (at the end of the video).
- Click on Done.
When you opt for other question types, follow these steps:
Print the stepsheet Adding Quiz Interactions
Step 3: Summary task
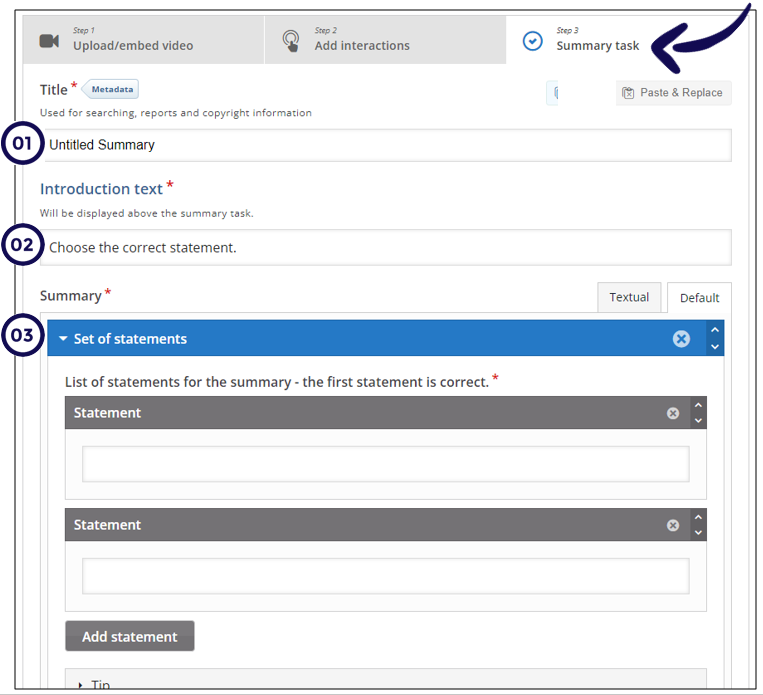
This optional Summary quiz will appear at the end of the video where you get the students to reflect on what they have learned. To Add Summary task, click on the Summary task tab.
-
Provide a title.
-
Add the introduction text which will be displayed above the summary task.
-
Add the Statements.
Note: You need one correct statement and at least one incorrect statement in each statement group for the Summary to make any sense.
-
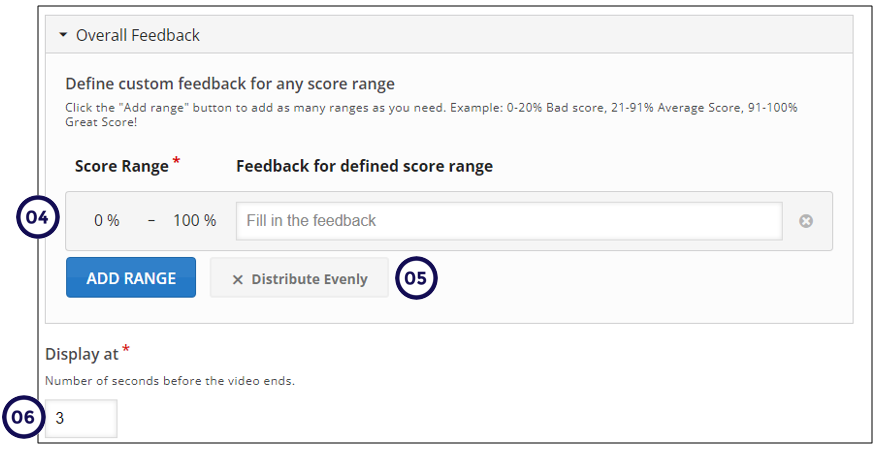
Add overall feedback using the score range.
-
To distribute the score click on Distribute Evenly.
-
Indicate the Display at- this is the number of seconds before the video end, this is when the summary task will appear.
-
Scroll to the bottom of the page to save and preview the video.
Preview the video
Review the interactions you have added to your video.
Note: The submit screen in the video is indicated by the star.
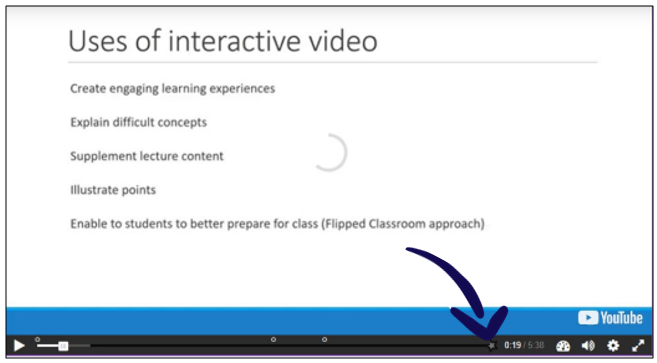
To revert to the edit mode, click on the Edit button (top left-hand side)
:::