Use this option when you need to create a small number of groups with a limited number of students.
With this option, you will manually assign students to groups.
Follow these steps:
-
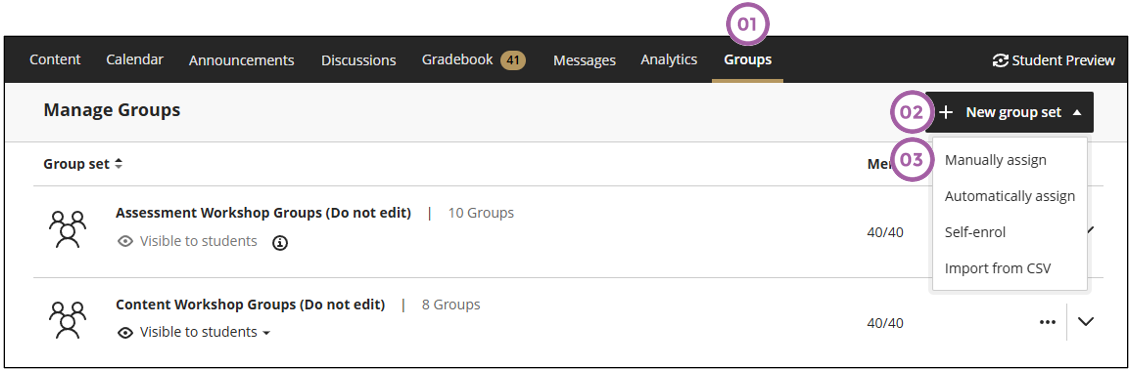
Click on Groups tab.
-
Click on + New group set.
-
Click on Manually assign.
-
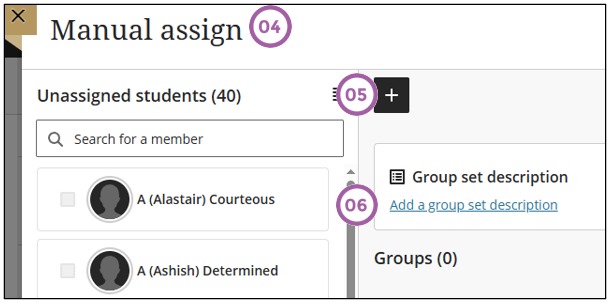
Add a title for the group set.
-
Use the + to create groups one by one.
-
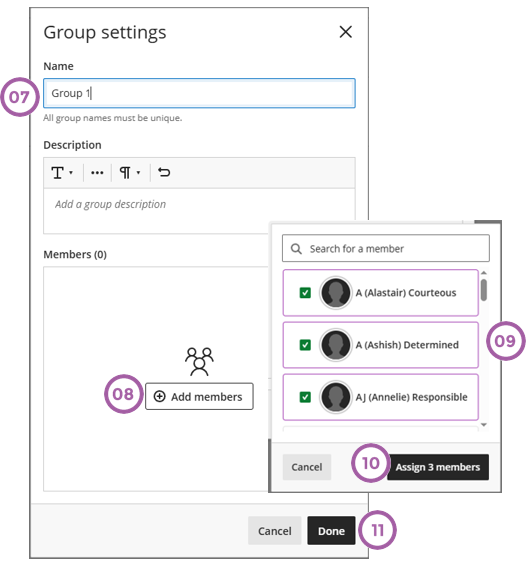
It is good practice to add a description for the group set. Students will not see the description, but other instructors in your course will be able to see what the group set is used for.
-
Provide a descriptive name for the group.
-
Click on + Add members.
-
Select the members. You can also search for students by typing their surname or student number in the search bar.
-
Click on the Assign members button.
-
Click on Done.
-
Click on Save.
-
Expand details will display the details of the members in the group.
This is what will be the result of following these steps.
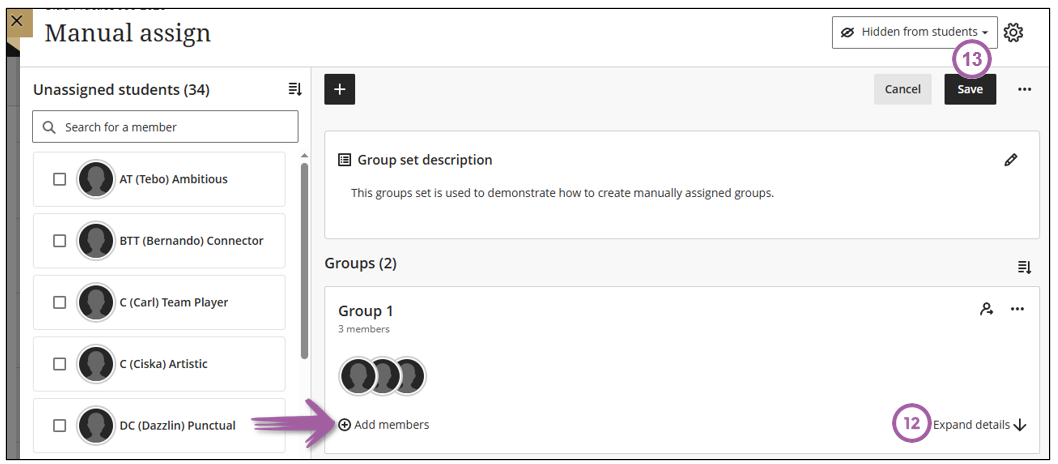
Repeat these steps for each group you need to create.
Use the + Add members option (indicated with the arrow) in the group where you want to add members
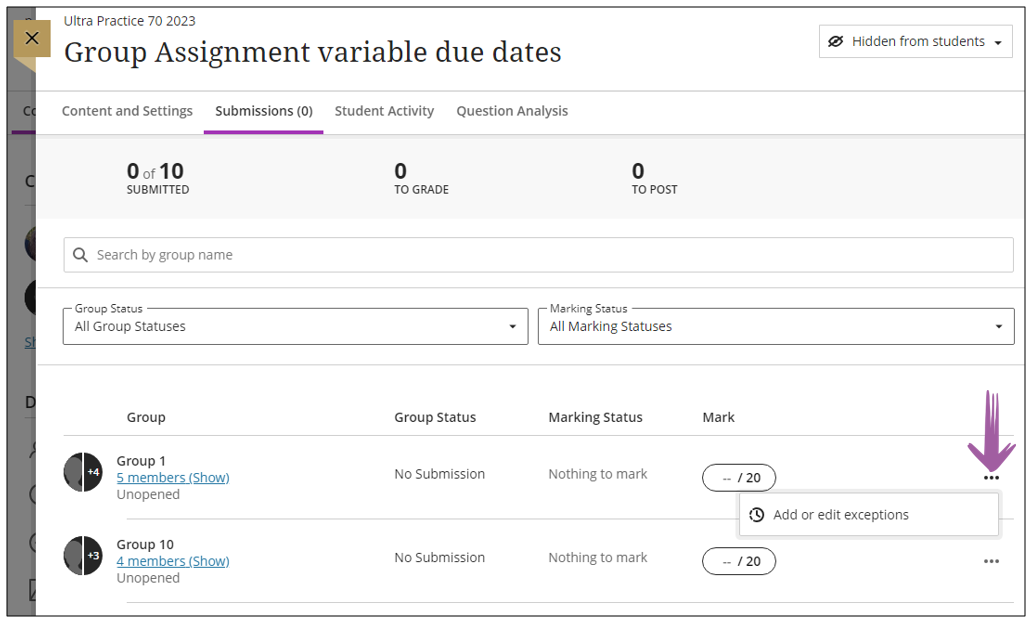
Different submission dates for different groups
If you need to provide extension to a group to submit their group assignment, you can use the Add exception function as per the screen cap below.
:::