- This step sheet is to create a few self-enrolment groups in a module.
- Upon creation a minimum of 3 groups.
Steps to create self-enrollment groups for a small number of groups
Follow these steps:
-
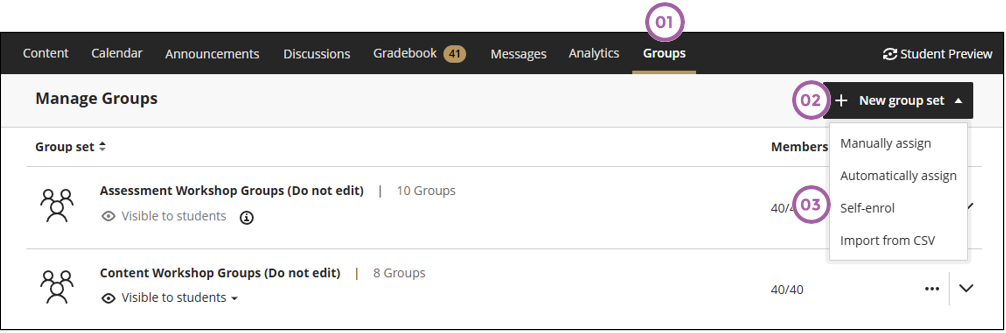
Click on Groups tab.
-
Click on + New group set.
-
Click on Self-enroll.
-
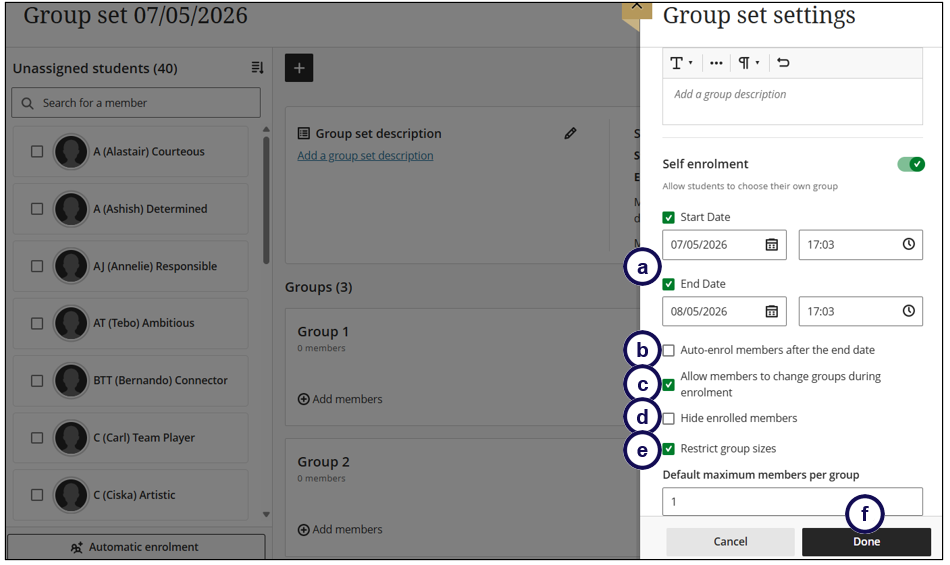
The Settings will open where you can add the following:
a. A start and end date for self-enrollment.
b. Tick this box if you want all the students in the module to be automatically enrolled by the End date. If only a few students (not all the students) need to be in the self enrolment groups, DO NOT tick this tick box!
b. Choose which of the options is applicable for your self-enrollment groups.
c. Note that you can decide if you want to allow students to move themselves to another group DURING the self-enrolment period.
d. Decide if enrolled students should be hidden (select tick box) or visible (DO NOT select the tick box).
e. If you want to restrict the group size, select the tick box. Note that you can indicate one student per group as the maximum number of students per group.
f. Click on Done.
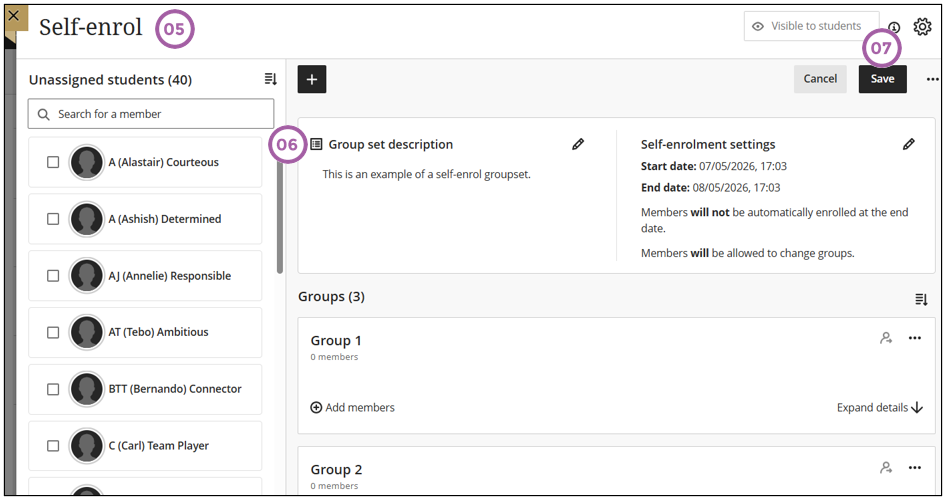
- Remember to change the name of the group set.
- It is good practice to add a description for the group set. Students will not see the description, but other instructors in your course will be able to see what the group set is used for.
- Click on the Save button.
Follow the steps from the automatically assign groups page.