Use this option when you need to create a large number of groups for all the students in the module.
When you choose this option, clickUP will randomly allocate all students to the groups. You specify the number of students in a group and it will calculate the number of groups required.
Follow these steps:
-
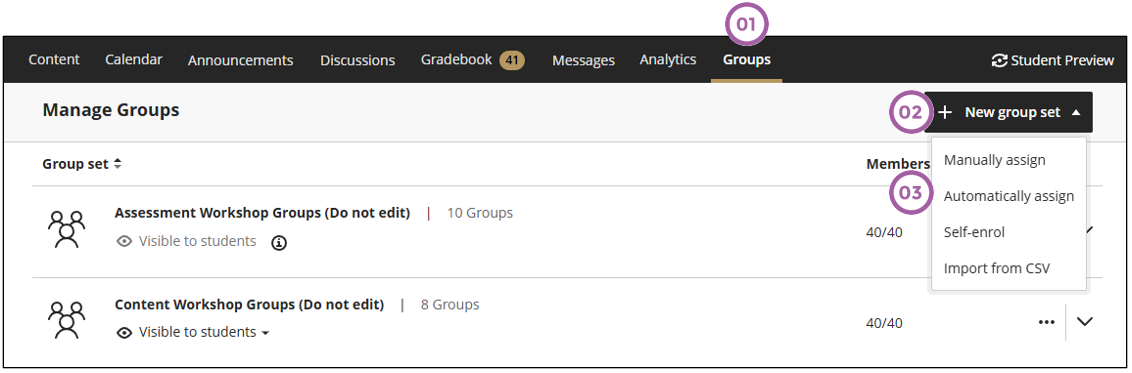
Click on Groups tab.
-
Click on + New group set.
-
Click on Automatically assign.
-
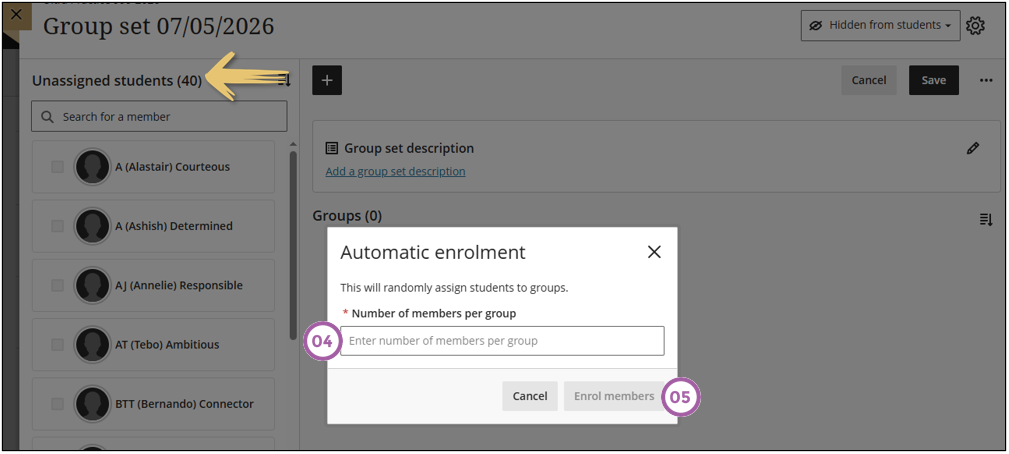
Take note of the number of students in the module (indicated with an arrow on the picture). Enter the number of students that should be allocated per group. ClickUP will automatically calculate the number of groups.
-
Once the groups were calculated, the enroll members button will become clickable.
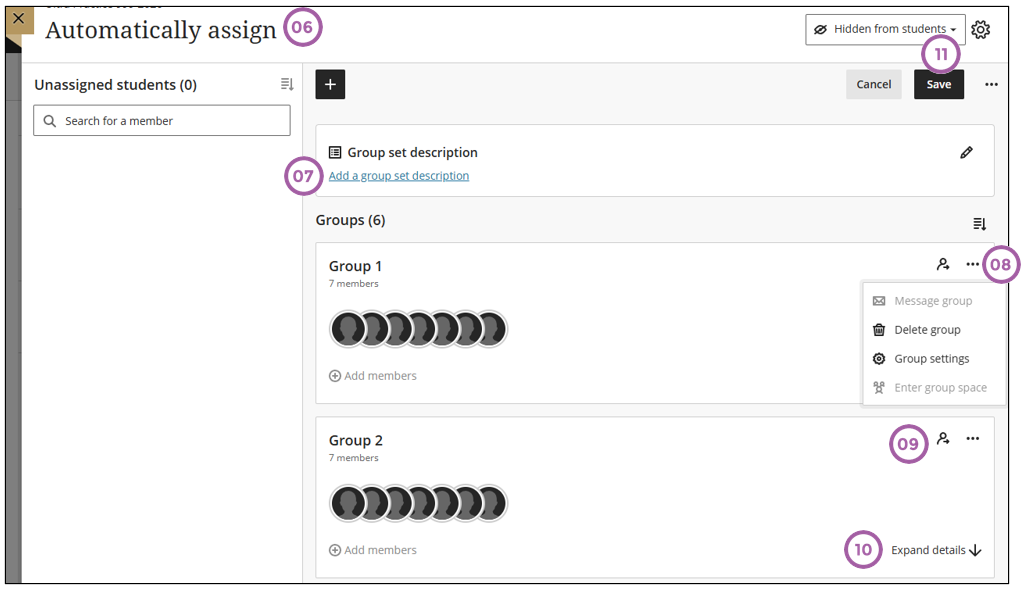
- Add a title for the group set.
- It is good practice to add a description for the group set. Students will not see the description, but other instructors in your course will be able to see what the group set is used for.
- Click on the three ellipses to display more options where you can:
- Message the group members
- Delete the group
- Change the group settings
- Access the group space.
- This icon will remove all members from the group.
- Expand details will display the details of the members in the group.
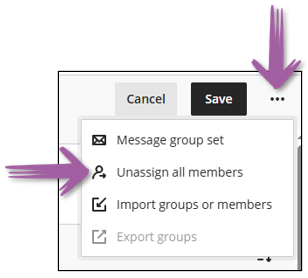
Unassign members
How to ...
- Unassign one member: Click on the expand option (indicated with number 10) to display the group members. Hover with the mouse over the student name block to display the unassign icon to click on.
- Unassign selected members: Click on the expand option to display the group members. Select the students. Click on the unassign icon to remove the selected members from the group.
- Unassign all members in a group: Click on the icon (indicated with number 9) to unassign all users from the group.
- Unassign all members from all groups: Click on the ellipses at the top of the page. icon (indicated with number 9) to unassign all users from the group.