When you need to break things down into dedicated spaces for specific sub-groups or individuals within your module, creating targeted sessions is the way to go. Here is how to set up smaller, dedicated group sessions quickly and easily.
Step-by-Step Guide
1. Navigate to Class for Teams: Go to the Class for Teams page for your specific module (where all your currently linked classes live).
2. Click "Create a new Class": You will find this button located prominently at the top of the page.
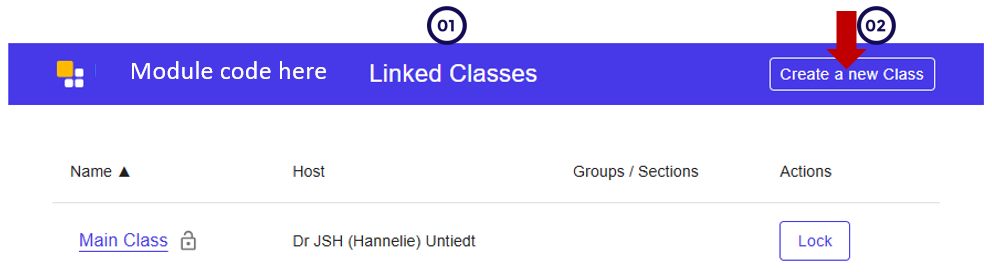
3. Select Your Group: In the pop-up window, select the specific group or individuals you want to create the space for.
💡 Note: The options appearing here are pulled directly from the existing groups already established within your module.
4. Save and Verify: Once you save, the new class will appear on your main dashboard. You will instantly be able to see the class name and view exactly who has access to it.
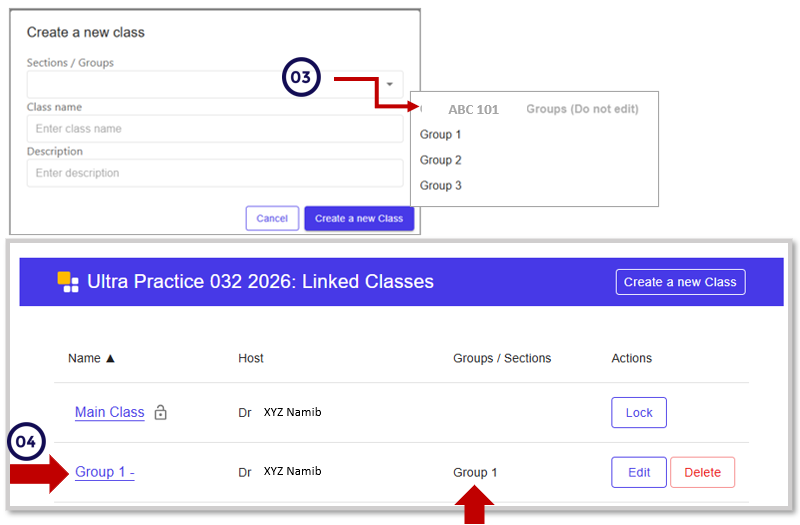
5. Schedule Your Sessions: Click on the newly created class link to open it, and begin scheduling your sessions for specific dates and times.
Who sees what? >To keep student dashboards clutter-free, this link is strictly restricted. Only the students who belong to the selected group(s) will see this class link or have the ability to join these sessions.
Next Steps
Now that your sessions are scheduled, you have the option to enter the room early and prepare your online classroom! See Preparing Your Online Classroom to learn how to pre-upload slides, set up polls, and configure your layout before students arrive.