Class for Teams allows you to create two distinct types of learning environments:
Main Classroom Sessions: Virtual spaces for the entire class, where all students enrolled in the clickUP module have access by default.
Smaller Group Sessions: Dedicated spaces for specific sub-groups of students within the module.
Scheduling Sessions in the Main Classroom
Critical Setup Notes for Instructors
⚠️ Important Access Rules:
- The Primary Host: The first instructor to open the Class for Teams link in clickUP becomes the primary host for the class meetings. The classroom remains completely unavailable to learners until an instructor sets up the class / create a session.
- The "Join Classroom" Button: The Join Classroom button visible at the top of your screen is an instructor-only tool. Students cannot see this button. Students will only see the individual sessions you schedule, and their "Join" button will only appear when a specific session is about to start.
- Do Not Copy Invite Links: Do not use the "copy invite link" feature to invite your students. Because clickUP is fully integrated, students must enter through the clickUP module link to be properly authenticated and tracked.
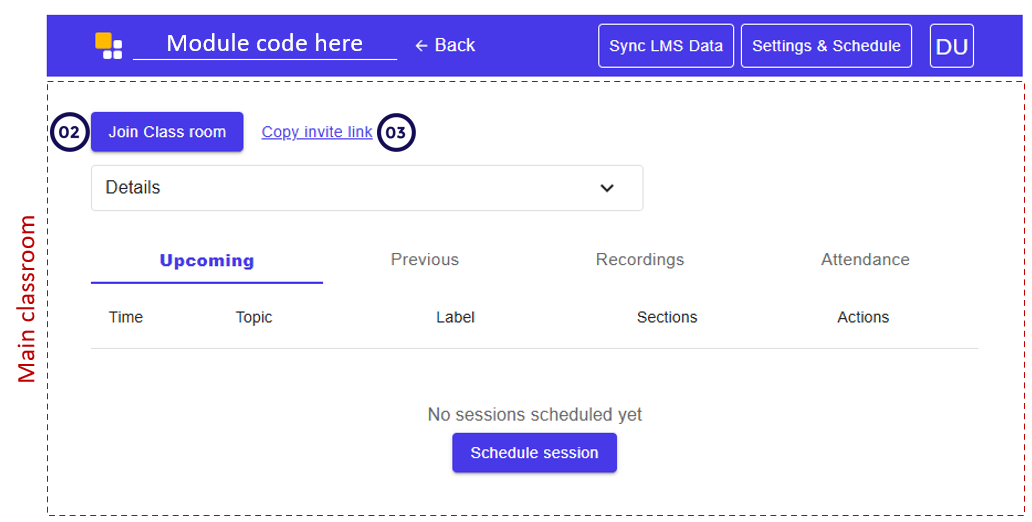
Step-by-Step: Scheduling a Session
Follow these steps to schedule virtual classes for your students:
1. Enter the Tool
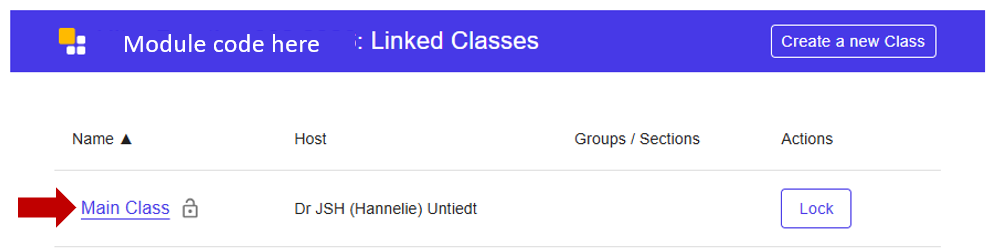
Find and click the Class for Teams link within your clickUP course content. The first time you click this link, you will be taken directly to the Main Classroom management dashboard. Should you have this screen open (See image below), select the Main Class link.
2. Initiate Scheduling
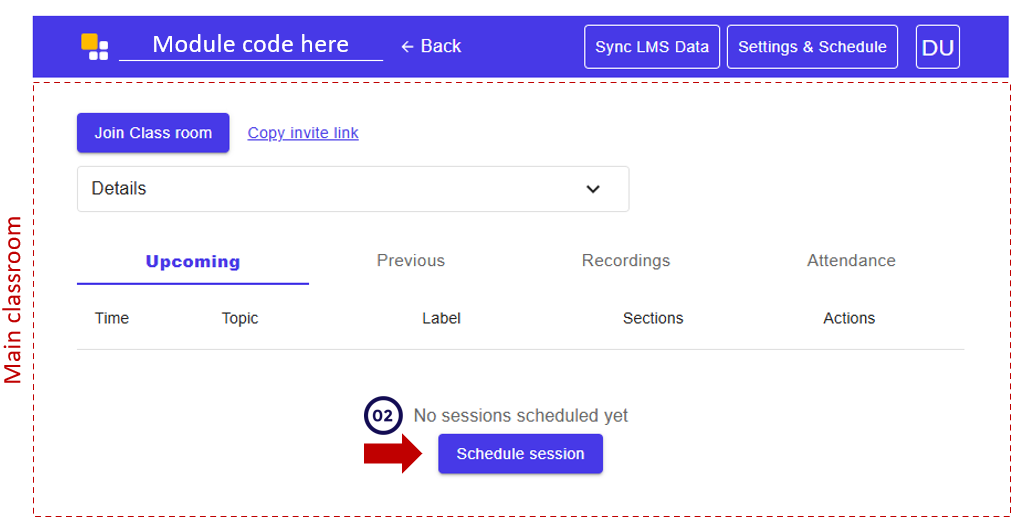
Click the Schedule session button.
3. Name Your Class
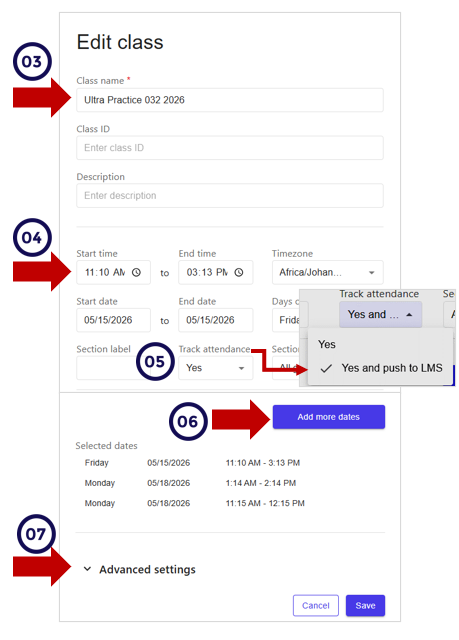
By default, the Class Name field will populate with your clickUP module name. You may alter this name if you wish to specify a particular lecture series or topic.
4. Skip Optional Fields
You do not need to fill out a Class ID or Description. These can safely be left blank.
5. Add Class Dates and Times
- Recurring Sessions: To create multiple sessions that meet at the exact same time slot on different days, select the specific days of the week you require.
- Varying Sessions: If you need to schedule sessions that take place on different dates and at entirely different times, click the Add more dates option to customize each one.
- If you want to track attendance of the sessions: select the yes and push to the LMS option.
6. Configure Advanced Settings Expand the Advanced Settings menu to customize the student experience:
- Early Join: Determine how many minutes prior to the official start time students are allowed to enter the virtual room.
- Attendance: Set up your preferences for how late arrivals affect automated attendance scores.
- Presentation: Always select this option. Activating this feature ensures you can upload and display PowerPoint presentations seamlessly during the live class.
- Access Settings: Leave these unchanged. Keeping the default access settings ensures your classroom environment remains highly secure and restricted only to your enrolled students.
- Save the Sessions Click Save to finalize the schedule. The sessions will now populate on your dashboard and will become visible to your students on their respective dashboards.