Before you start: Check the Browser and System Requirements for Class for Teams
To ensure a smooth, uninterrupted teaching and learning experience, please verify that your device meets the following hardware, software, and network requirements before hosting or joining a live session.
Click here to check Browser Support and System Requirements for Class.
Adding Class for Team in your module
Class for Teams is seamlessly integrated directly into your clickUP environment. Because of this integration, students enrolled in your clickUP module are automatically synced to your Class Roster inside Class for Teams.
You do not need to send manual invitations to your students.
To get started, you simply need to add the Class for Teams access link to your module's content area so your students can find and access your virtual sessions.
Step-by-Step Instructions
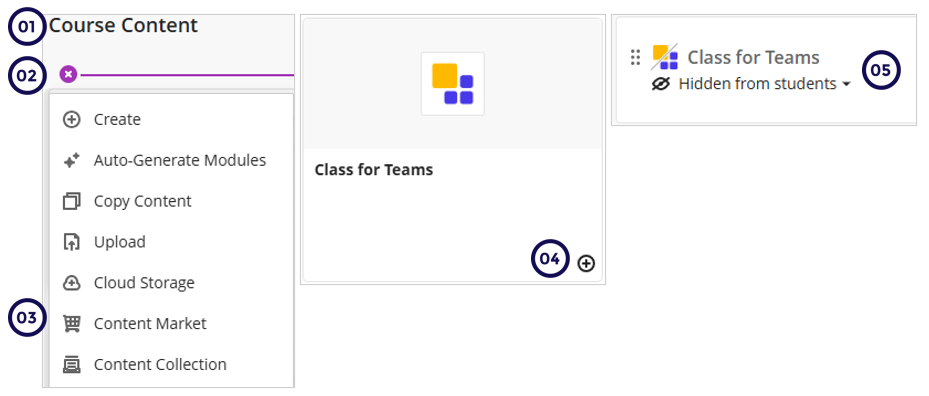
- Navigate to the Content Tab
Open your clickUP module and go to the Content tab. - Choose a Location
Locate the exact place where you want the link to appear and click the plus icon (+) to add new content. - Access the Content Market
From the drop-down menu that appears, select Content Market. - Add Class for Teams
Locate the Class for Teams tool within the Content Market menu. Click the plus icon (+) on the Class for Teams tile to add it directly to your content page. - Update Visibility Settings
The link will now appear on your content page.
By default, newly added tools are set to Hidden from students. Remember to click the visibility toggle next to the link and select Visible to students so your class can access it.