There are different ways to include images on Ultra Documents. Keep consistency in mind when you decide which option to use. You can either insert the images using the following block options:
Take note that if you decide to add captions to images, then add all your images using the image block otherwise it will be inconsistent if some images have captions and others not. Always consider applying good design principles consistently.
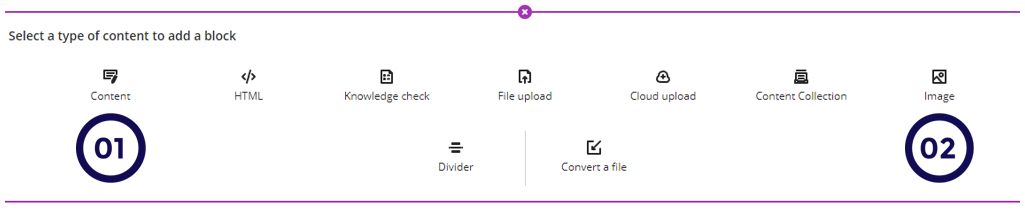
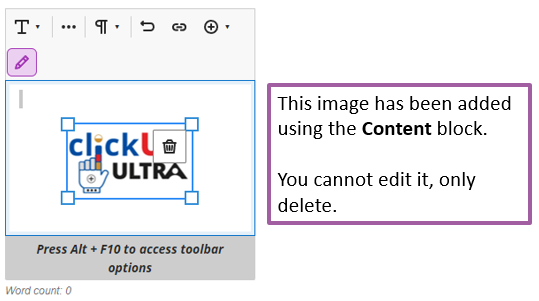
1. Insert images using the content block
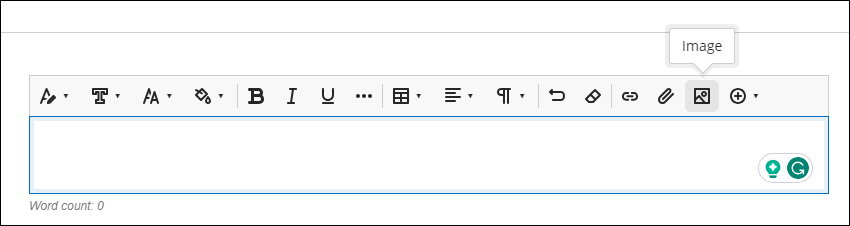
Within the Content Editor, click on the image icon.
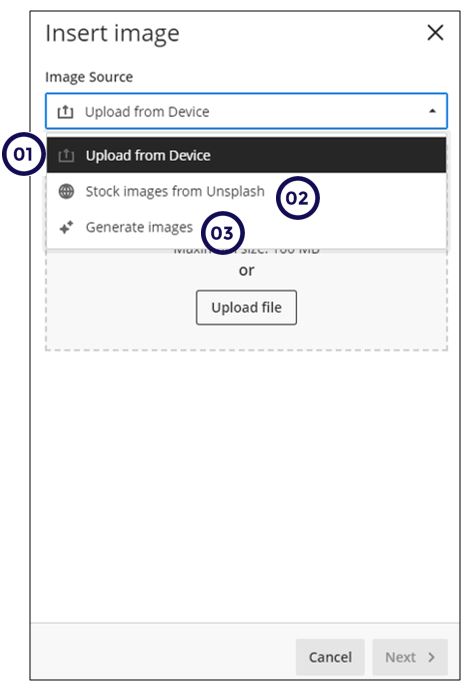
Follow these steps when inserting images:
- Upload from your computer.
- Search free images from the Unsplash database.
- Generate your own images using AI prompts.
Please note that when you use this option you will not be able to add captions to the image.
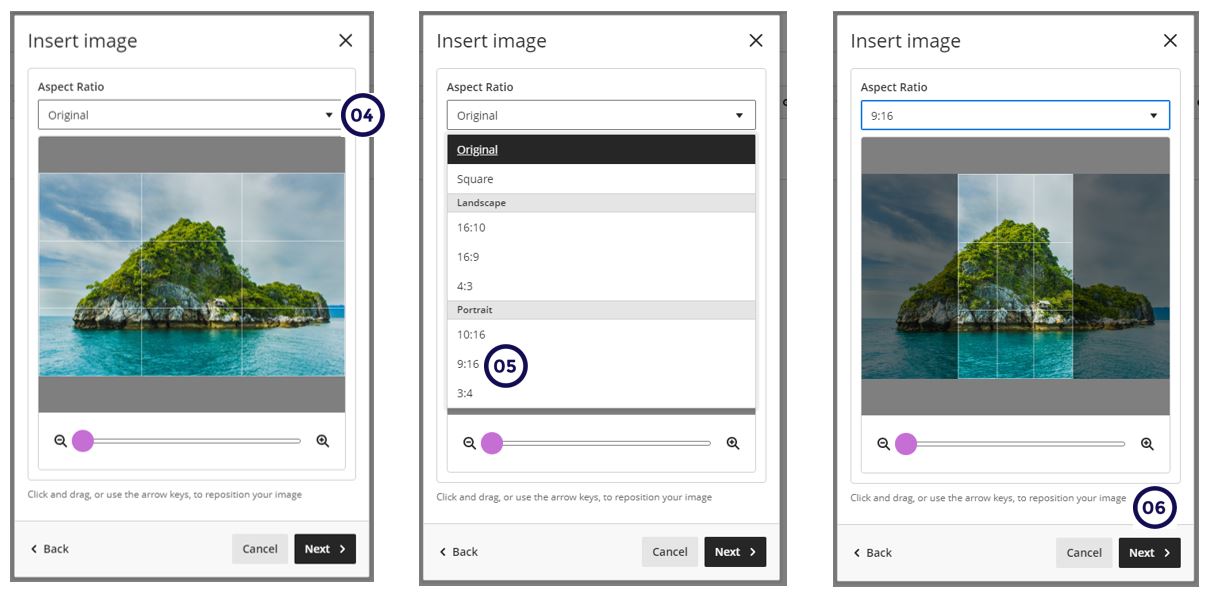
Reposition focus and aspect ratio
After selecting the image, you can crop and select which part of the image you would like to use.
4. Click on the drop-down arrow to view the aspect ratios.
5. Select the aspect ratio that best fits your picture.
6. Click on Next to display the repositioned focus.
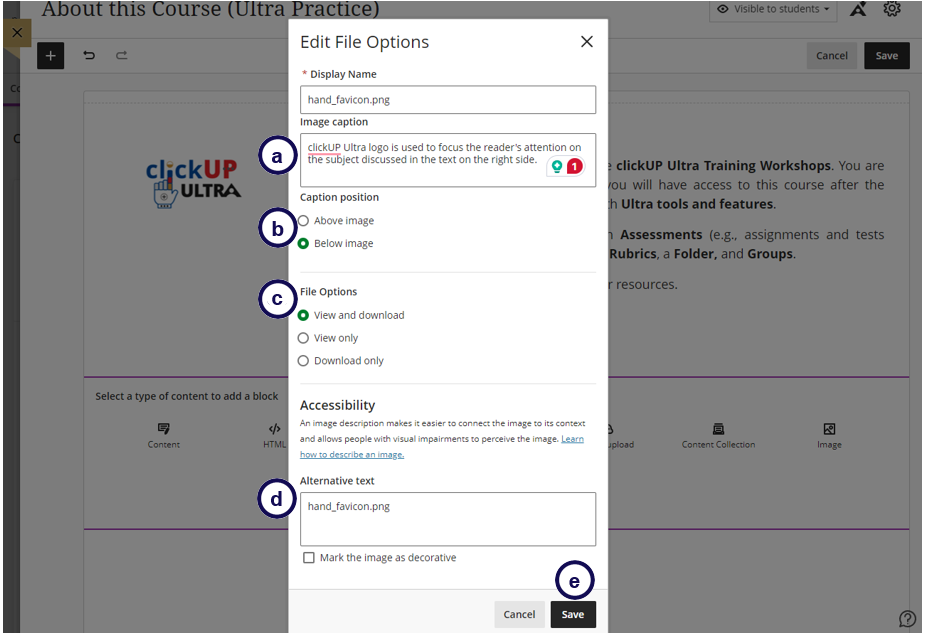
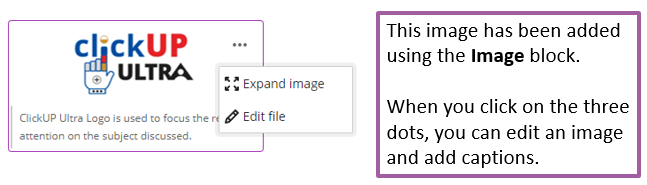
2. Insert images using the image block
You can upload an image from your device or generate images or choose stock images from Unsplash. You can also choose to caption images.
Follow the same steps as explained above. When you click Next, edit the file options as follows:
a. Add the caption.
b. Decide where it should display - above or below. Choose the same option throughout your course design.
c. Decide if it should be downloadable.
d. Add the Alternative Text.
e. Click Save.
To determine if you can add captions, check if there are three dots available as explained in the two images below:
vs
3. Auto-generate images
You can directly insert AI-generated or stock images into the text editor by selecting the Image button.
- Add alternative text to each image to allow screen readers to read the description to visually impaired students.
- If an image is decorative, mark it as such.
- Keep the impact of image size on students' data usage in mind when choosing to use images.
Refer to the AI Design Assistant page for details about all the AI-assisted tools.